1.1 Kapaladhati breathing
We begin our lesson by warming up all body systems using Kapalbhati practice. It will be an excellent habit if you do this practice every morning in the fresh air or in a well-ventilated area.

Benefit of Kapalabhati

Nasal passage is cleared of impurities;
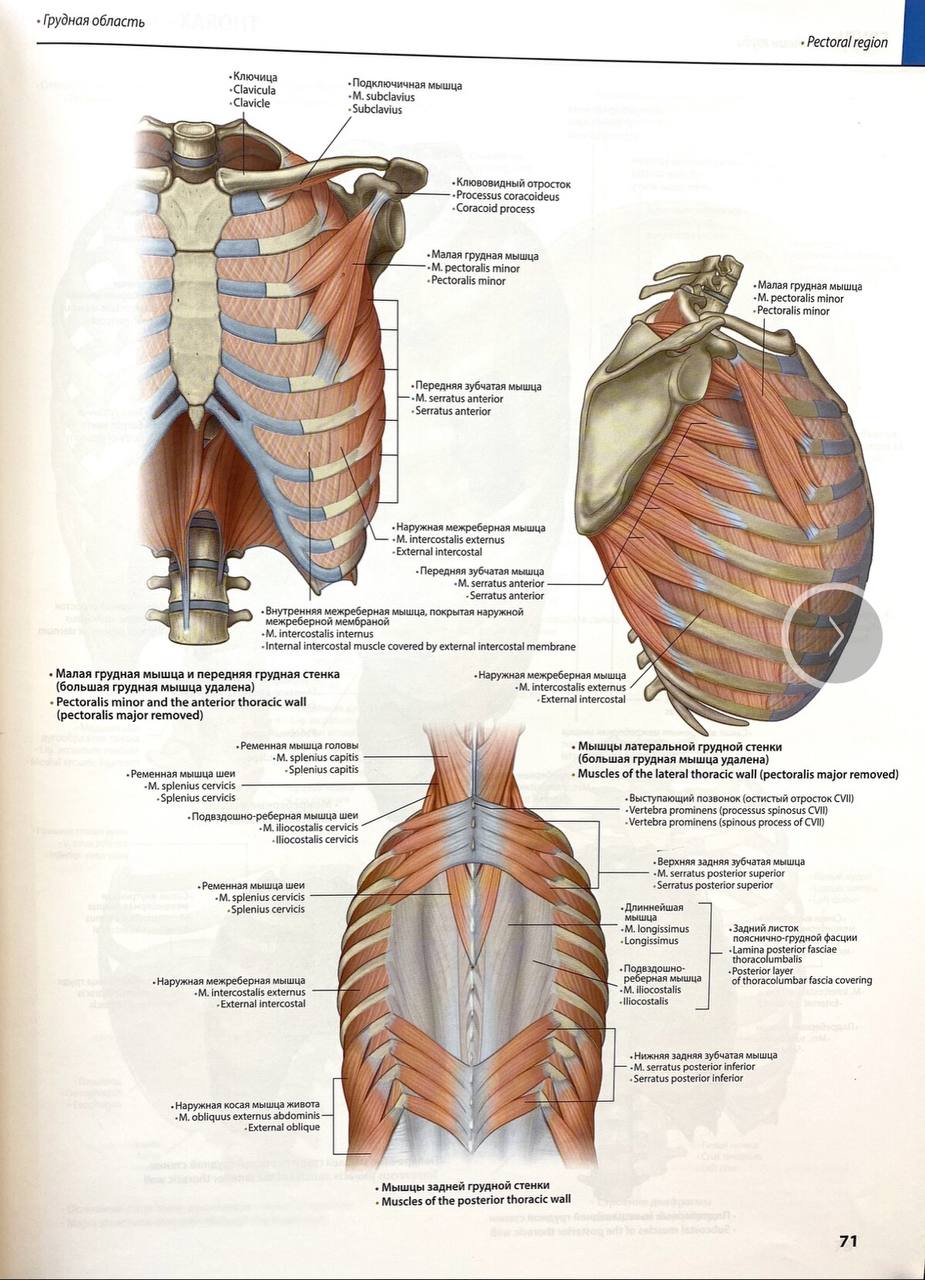
Straight abdominal muscles and intercostal muscles are trained;
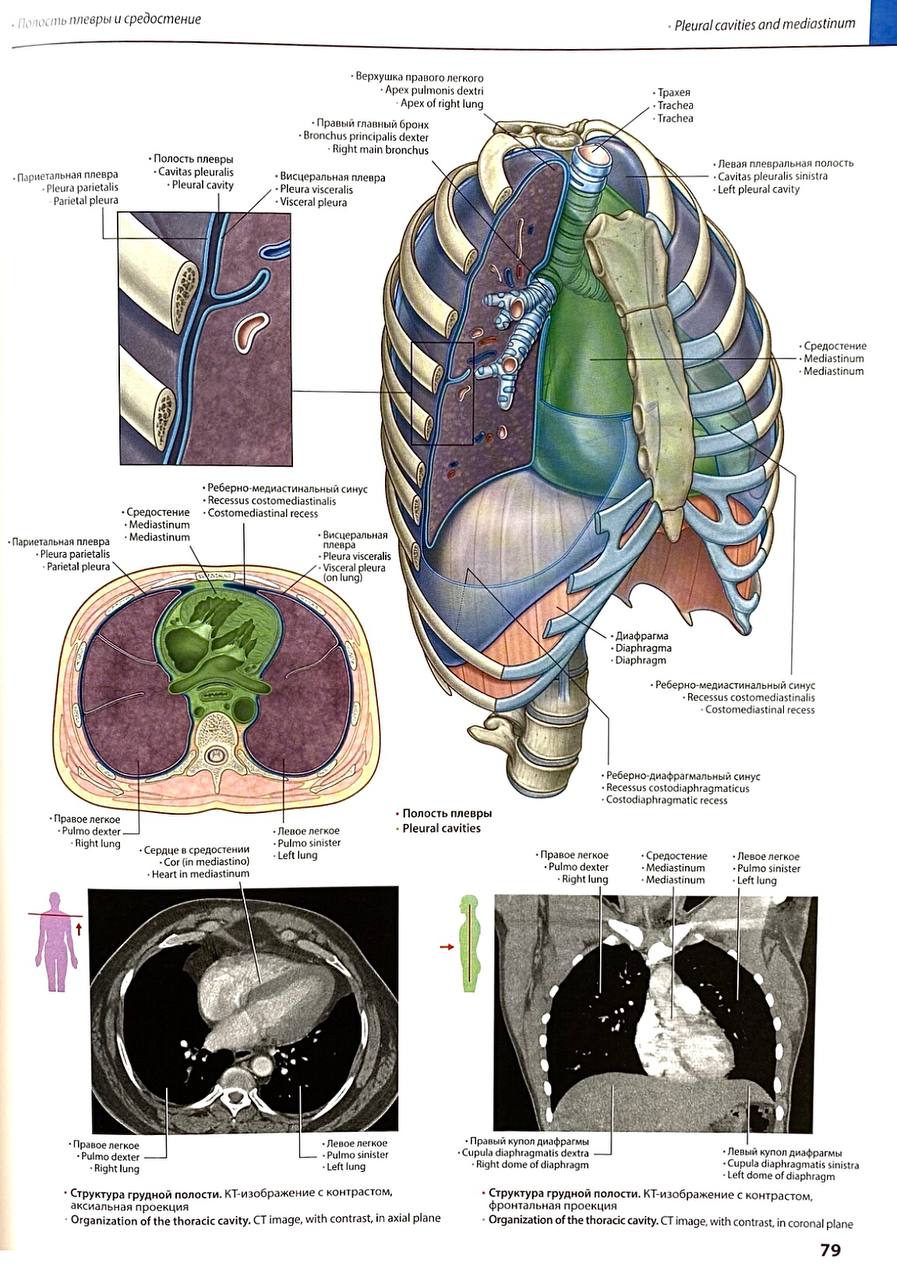
Cardiovascular and respiratory systems are trained;
Abdominal organs are massaged and microcirculation is increased, improving their nutrition;
Sympathetic nervous system is activated;
Improved attention concentration;
Headaches (especially due to changes in weather) become less frequent or disappear completely;
Diastasis is reduced
Benefit of Kapalabhati

Take a comfortable meditative posture.

Straighten your spine, placing the crown of your head over the coccyx. Maintain this position throughout the practice.

Regulate your breathing. Place the tip of your tongue on the palate behind the front row of teeth. Do not press the tongue against the palate, the contact should be very gentle.

Take a deep breath through the nose and then start active exhales through the nose, simultaneously working the abdominal wall and directing it towards the spine. Inhalations are short and occur involuntarily due to the relaxation of the abdominal muscles — a natural reaction of the body to forced exhalation. Exhalations are rhythmic, powerful, and intense. With each exhale, the abdominal muscles contract and direct inward.
Perform several cycles of this breathing (one cycle is one inhalation and exhalation). For beginners, it is enough to perform 15 to 50 breathing cycles. Experienced practitioners perform 108 cycles of this breathing.

Recommendations:

Perform Kapalabhati on an empty stomach. Either in the morning on an empty stomach or 4 hours after eating.

If you feel that your exhales are becoming irregular — this is a signal to stop the exercise.

Refrain from smoking during the practice marathon.

Do not practice in a dusty or dirty environment. It is best to do it in the fresh air or in a well-ventilated room.
Contraindications

Pregnancy
Brain tumor
Previous head injuries
Malignant tumors
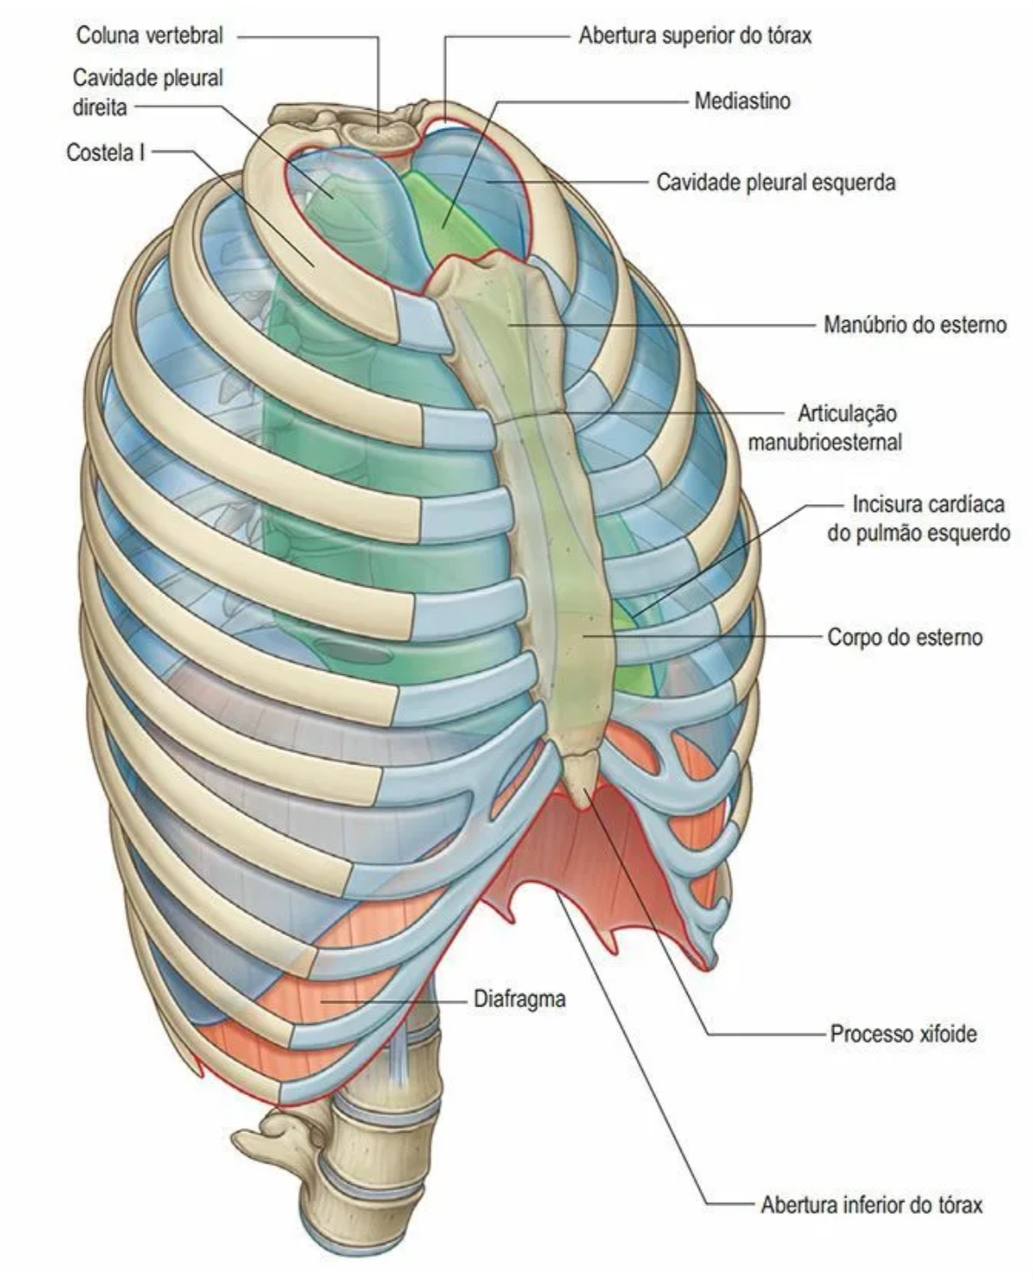
1.2 Technique for the thoracic diaphragm
1st Technique
Starting position: sitting or standing
Wrap palms about lower ribs
Take a deep inhalation and then maximal exhalation
Squeeze the chest on maximal exhalation and start making light vibratory movements to the centre of the torso (to the space between the arms) for 5-10 seconds. Dissolve the tension with your inner attention.

Continue vibrating movements on the inhalation
Help yourself with inner attention. To intensify the sensations, close your eyes. Repeat 2-3 times.
Postisometric relaxation
Starting position: sitting or standing, pelvis fixed in a neutral position
Wrap palms about lower ribs and turn the chest to the side as far as possible
Take a deep breath and hold the diaphragm in this position for 5-10 seconds until you feel a burning sensation and tension
Exhale sharply and return your torso to a neutral position
Repeat the exercise on each side for 2-3 time
Pay attention to how your breathing changes. If you are doing the exercise correctly, you will start breathing deeper.
Stop exercising, if you feel very dizzy.

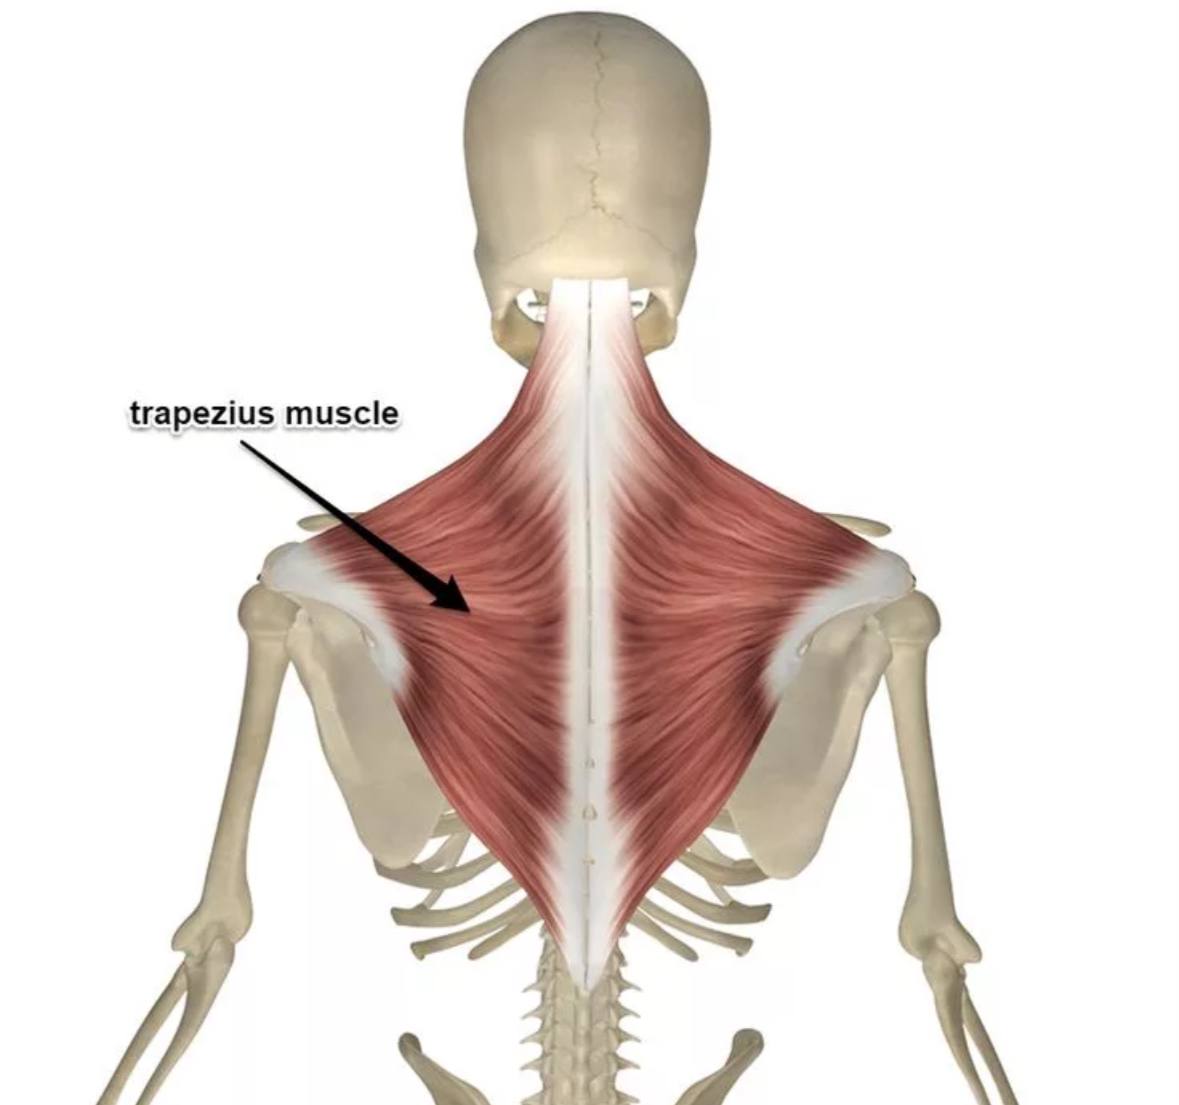
1.2 Technique for the thoracic diaphragm
Technique
The 1st stage is to warm up muscles:
starting position is standing (sitting is also possible if necessary)
remove the arm to the side and slightly backwards
turn the back of your head towards the shoulder of your outstretched arm and bring them as close together as possible.
keep pressing the back of your head into your shoulder for 10-20 seconds until you feel the maximum sensation of heat or burning.
release tension
The 2nd stage is to stretch muscles
remove your arm behind your back, fixing your shoulder in place.
turn the face to the working shoulder and start tilting your head to the opposite side. You can increase the tilt with your other hand, but do not put too much pressure on your head.
take a deep breath and increase the incline as you exhale. Repeat from 1 to 3 more times.
return to the starting position
Evaluate the result in the mirror in comparison to the side that has not been worked through. Perform the exercise on the other side
❗ Skip the exercise if you feel pain or discomfort in the vertebrae
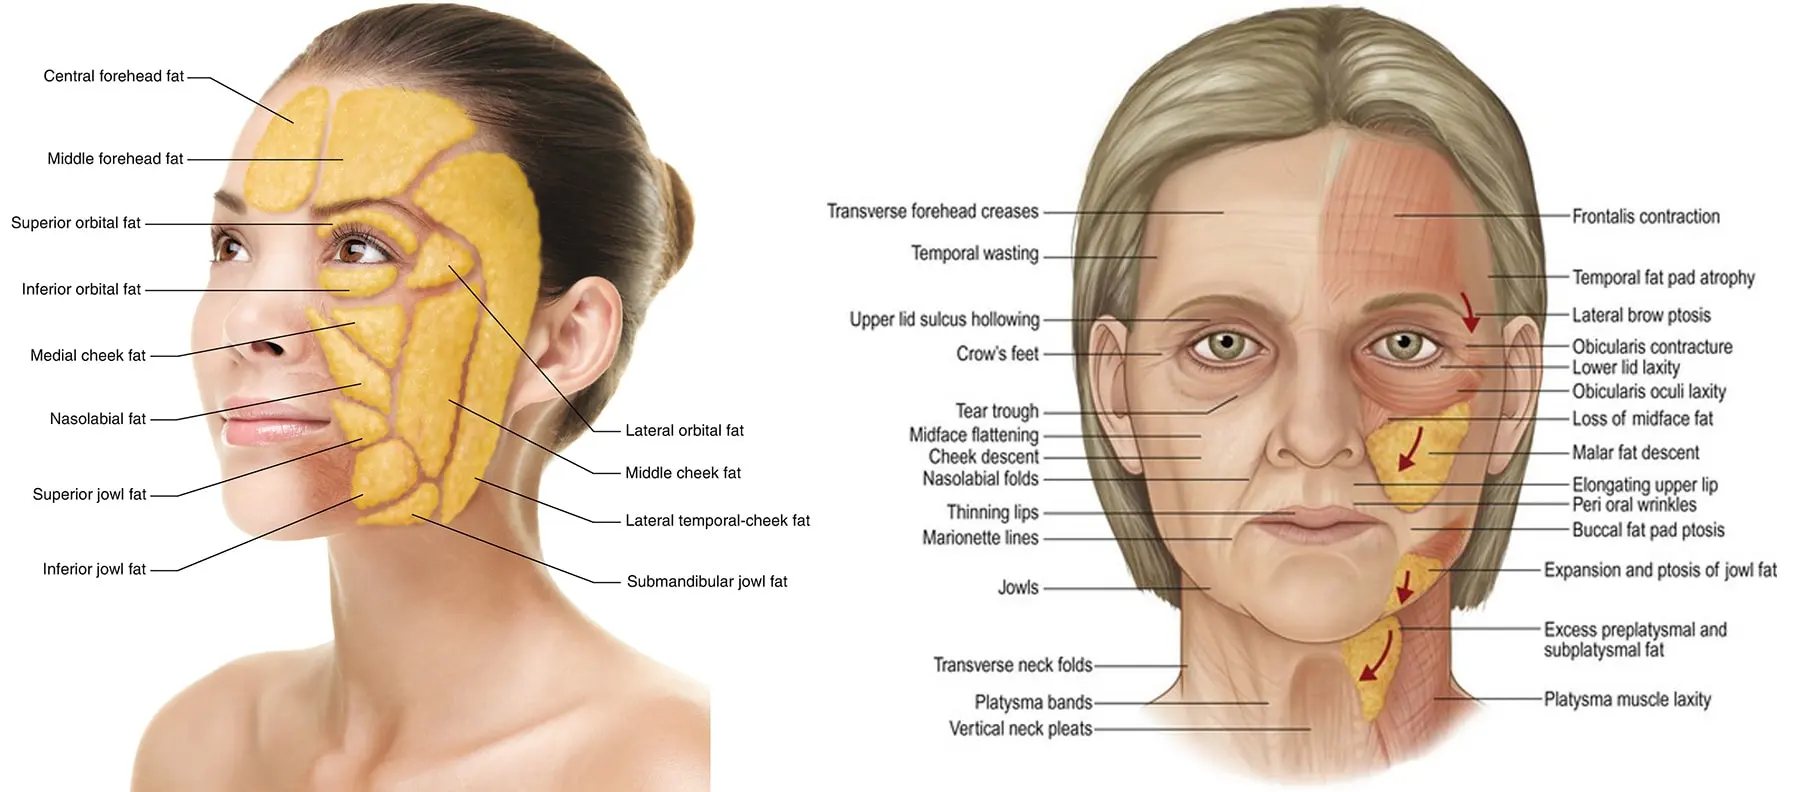
1.4 Exercises for correcting subcutaneous fat on the face
The exercise is aimed at improving nutrition in the subcutaneous fat layer on the face.
With age and due to the accumulation of stresses in the tissues, stagnation may form, which will interfere with good blood supply and lymph flow. It course the face will lose volume.
If you have thin skin, try to do the exercise delicately, no more than 1-2 times a week.
If the skin is dense and swollen, you can practice the technique up to 3 times a week.
We practice these and other techniques in our Rejuvenation Club.
Join us and make a habit of being better TOGETHER every day